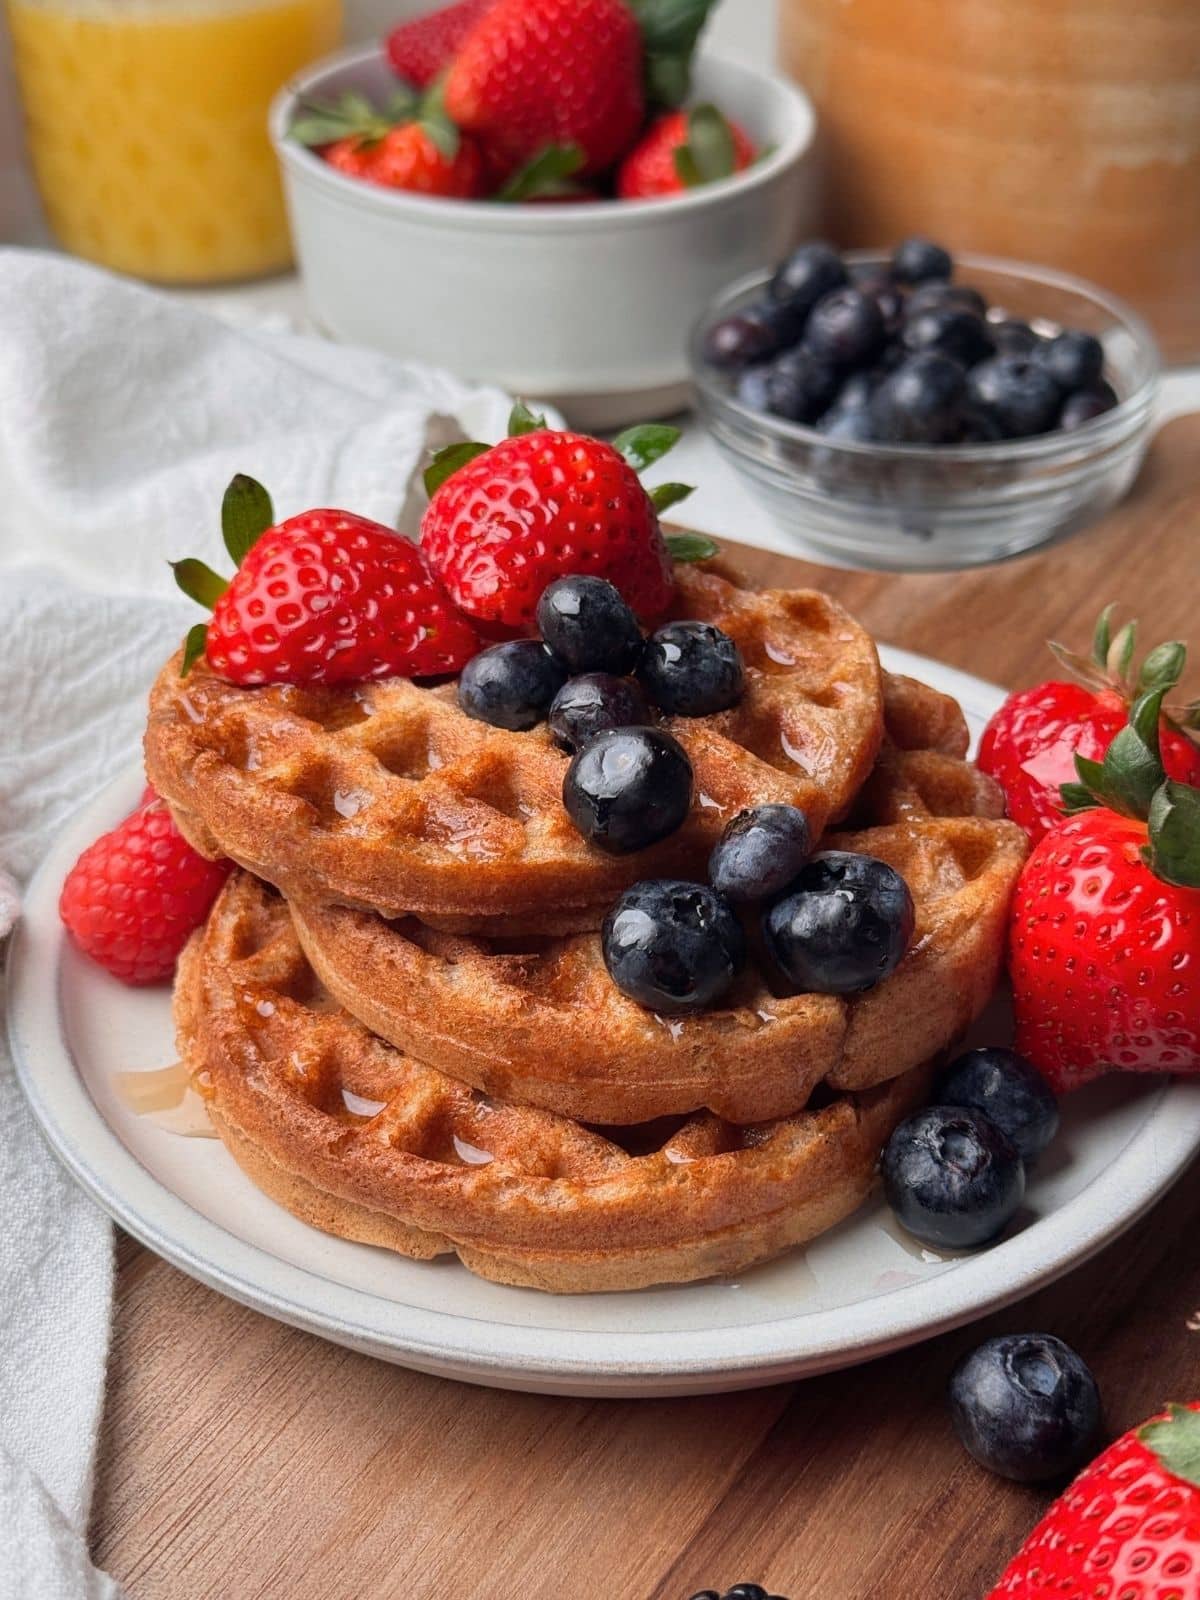
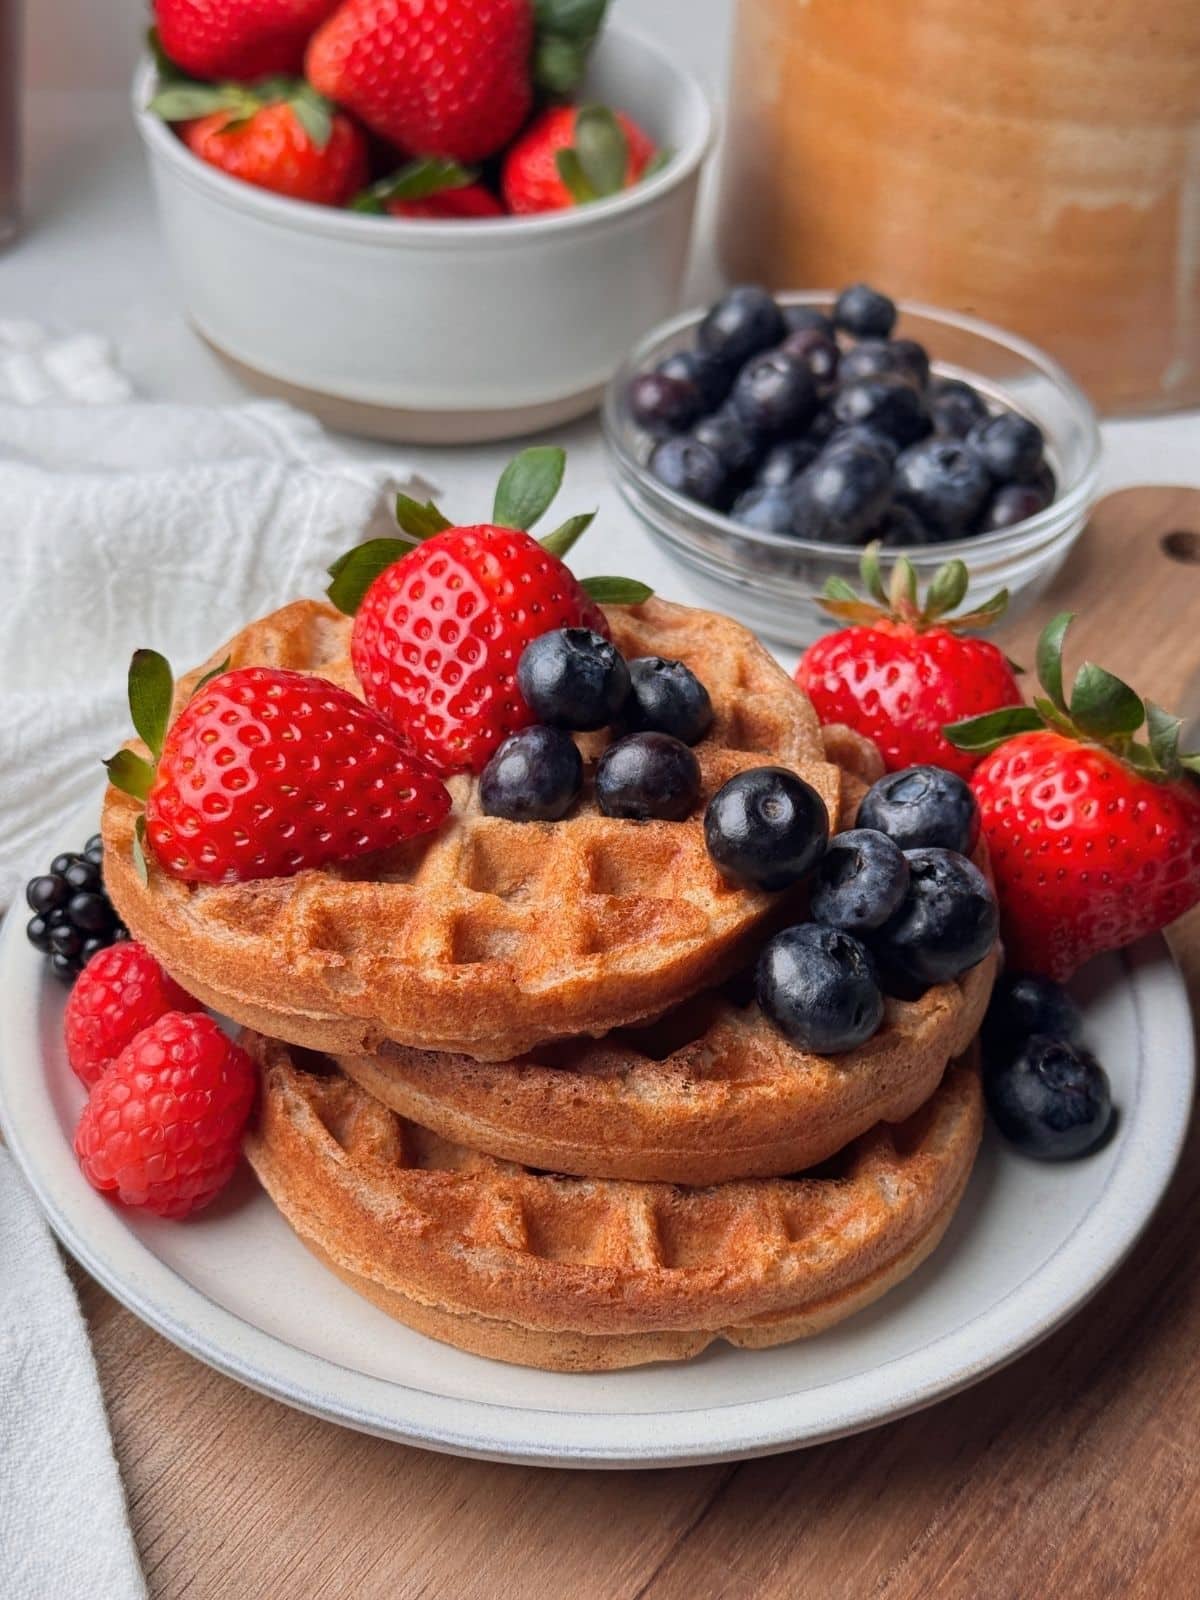
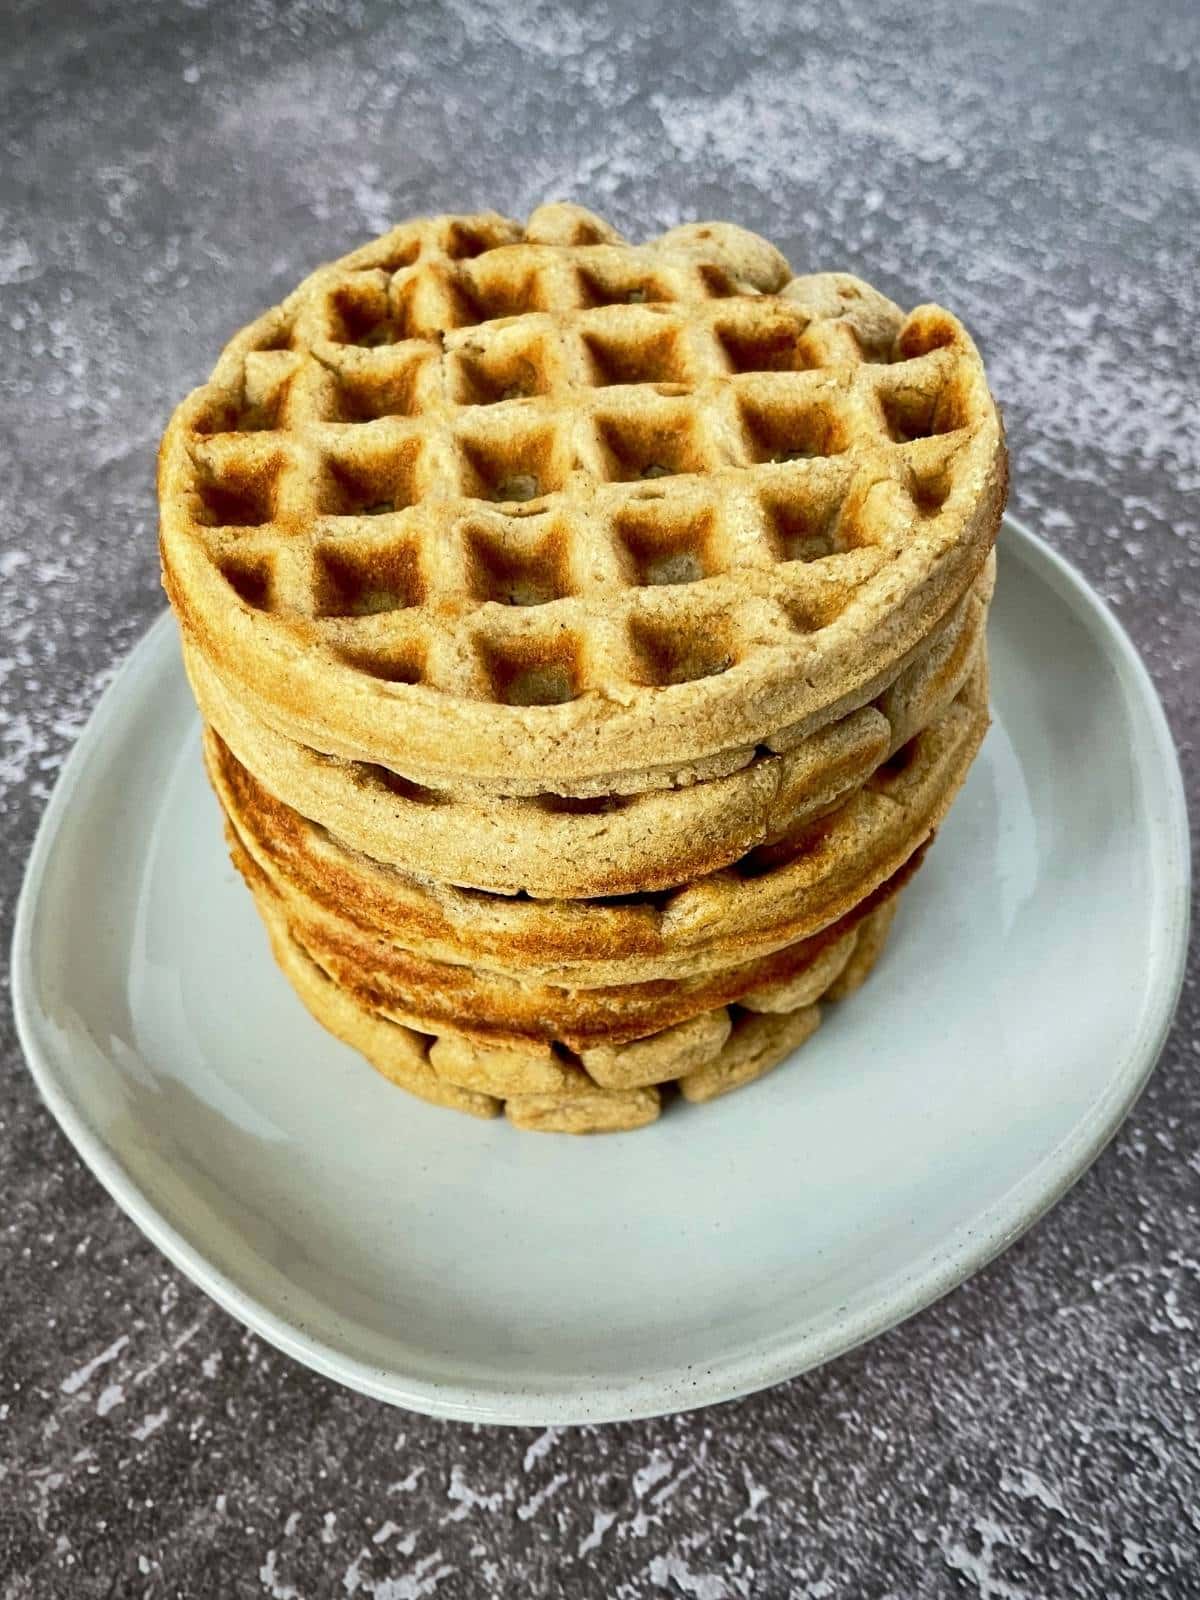
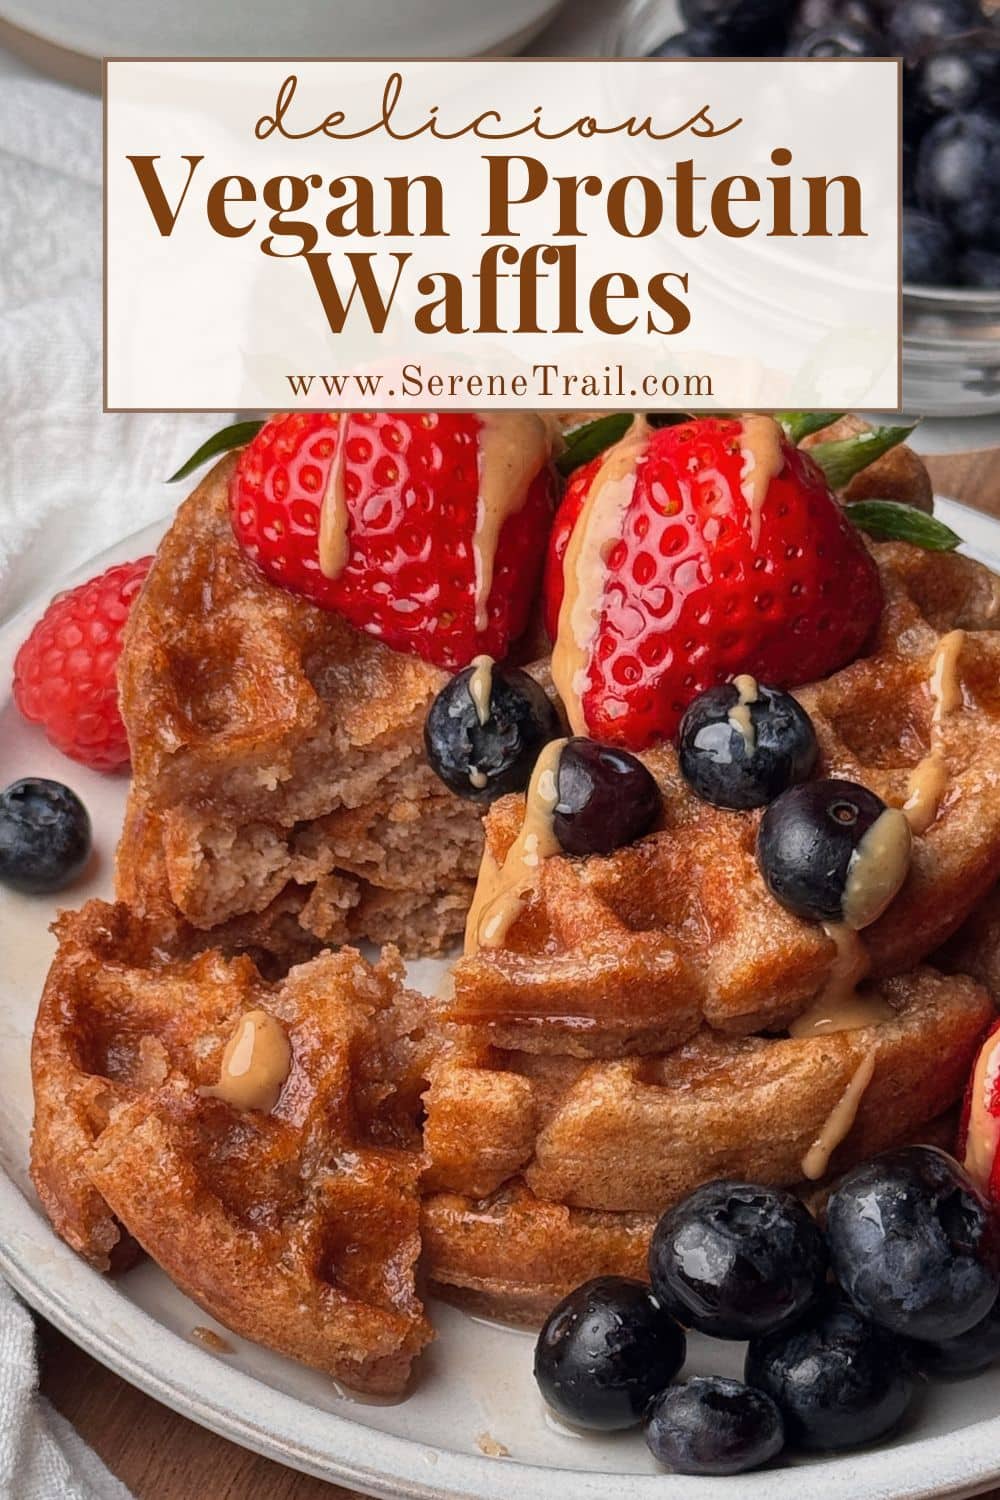
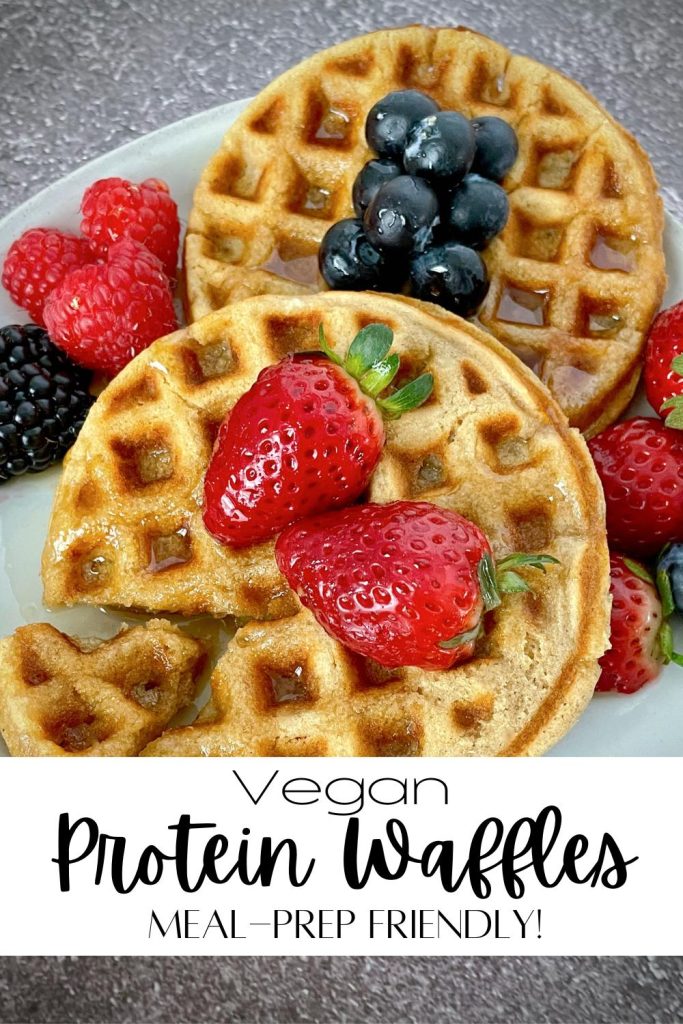
Your wholesome breakfast is just minutes away! These protein waffles (vegan) are crispy on the outside, yet so soft and fluffy on the inside. They are delicious, packed full of protein, freezable, and meal-prep friendly!
This post may contain affiliate links. Please read my disclosure policy for more information.

Whether you’re into fitness or simply want more protein in your diet, these waffles are for you! They are quite filling with 12.2 grams of protein per serving.
They only need a few simple ingredients, such as plant-based vanilla protein powder, and are ready to devour in just 15 minutes. My absolute favorite protein to use in this waffles is Earth Chimp’s vanilla flavor. This brand uses clean ingredients and tastes incredible. (You can use code SERENETRAIL for 10% off.)
These homemade waffles are great for breakfast meal-prepping, brunch with the family, to enjoy after a workout, or even part of a vegan chicken and waffle meal!
I like to whip up a batch when I’m not in the mood for another cold breakfast smoothie, but I still want to get my protein in.

We eat them throughout the week and even stockpile them in the freezer for busy mornings. Just pop them into the toaster, add your favorite toppings, and dive in!
Actually, the toppings can be skipped because these waffles are pretty tasty as they are. They are full of flavor and lightly sweetened so they really don’t even need syrup.
I just love how they don’t taste like cardboard the way many other high-protein foods seem to. For more high-protein vegan breakfasts, be sure to check out my Chocolate Chip Protein Cookies, Chocolate Peanut Butter Protein Bars, and Tofu Scramble Sandwiches!
Reasons You’ll Love this Recipe
- Eggless
- No dairy
- Nutritious
- No banana
- Kid-friendly
- Protein-packed
- Freezer-friendly
- Great for meal prep
- Just a few ingredients
- 12.2 grams of protein per serving!
Are you wondering whether you should buy a waffle iron or not?
A waffle iron is a pretty important kitchen gadget needed for this recipe. If you’re on the fence about buying a waffle iron, I think you should!
I debated this purchase for quite a while, especially because I didn’t want to have to find a place to store it in my tiny kitchen. I finally decided to get a miniature-sized one because I love waffles and because I learned that there are so many things to cook with it.
I use a Dash mini waffle iron, but any will work, including full-size and Belgian.
What else can I make with a waffle iron?
The possibilities are limitless with waffle irons! Mini-waffle iron recipes have gone quite viral on TikTok recently. Some neat ideas that I’ve seen are sweets such as cakes, muffins, cookies, turnovers, baked oats, and cinnamon rolls.
You can even make bread, biscuits, burgers, and hash browns in them. Of course, waffle irons are also great for toasting sandwiches, paninis, and pizza rolls!
Get updates on my latest recipes sent right to your inbox! Click Here To Subscribe To My Email List!
Ingredient Notes and Substitutions
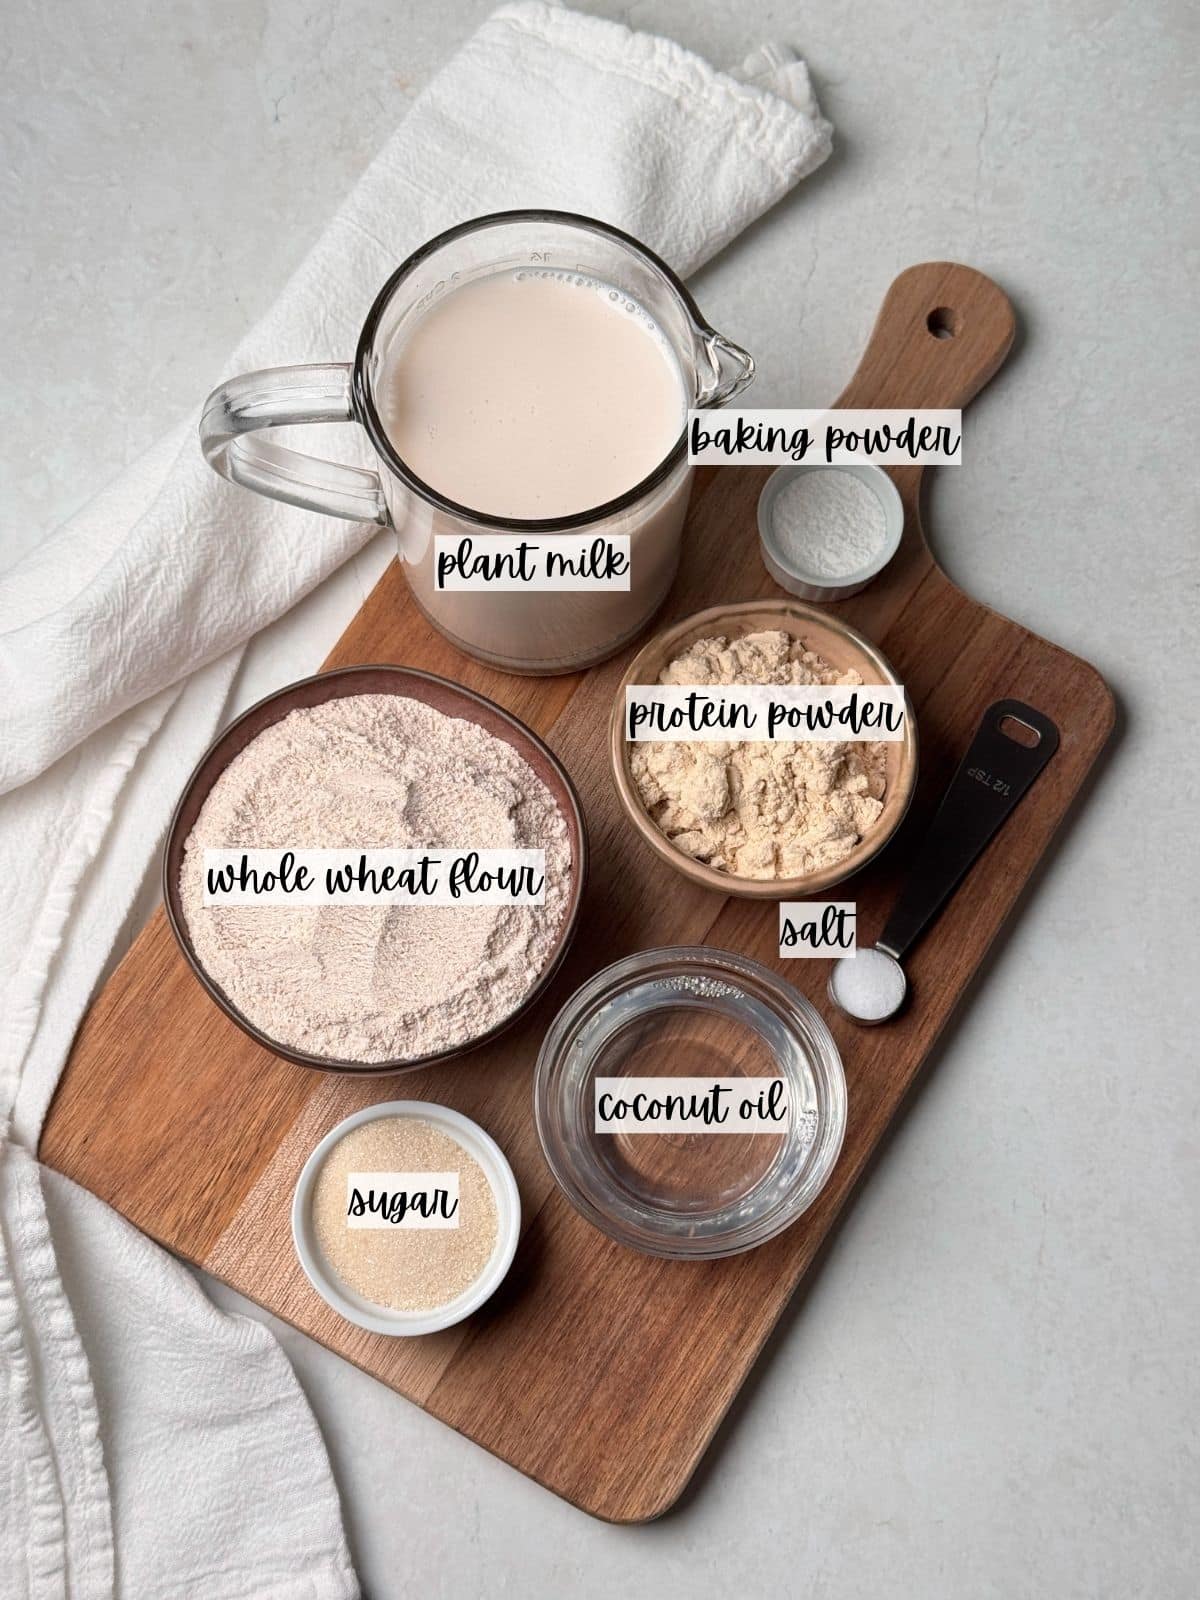
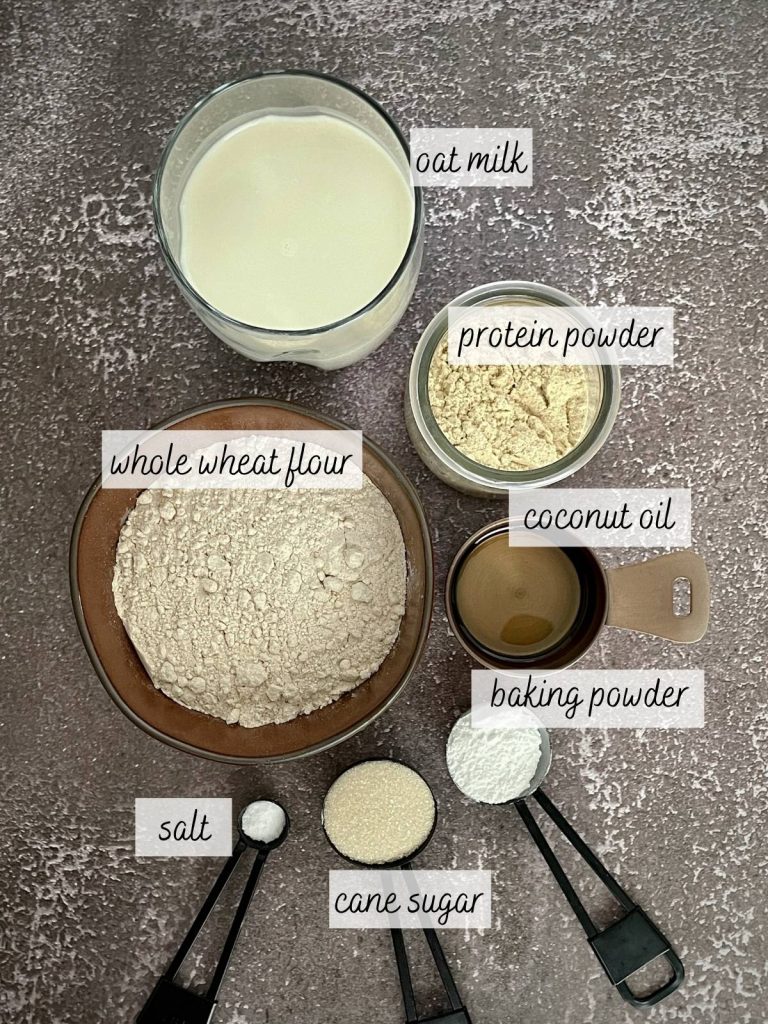

- Protein Powder – Use your favorite! I love using Earth Chimp Vanilla Protein Powder here. Other flavors can work too, such as strawberry, chocolate, peanut butter, etc. After trying out MANY different protein powders, this brand is my favorite. Not only because of high-quality ingredients, but also because of the delicious flavor.
- Flour – Either whole wheat or all-purpose works! You can also use gluten-free 1-to-1 if you’d prefer.
- Plant Milk – Soy milk provides the most protein, but any of them are great here.
- Coconut Oil – Melted coconut oil helps hold the rest of the ingredients together and locks in moisture. You’ll want to pop your coconut oil in the microwave for about 15 seconds after you measure it out. Another option that would work is an equal amount of melted plant-based butter.
- Baking Powder – Baking powder (aluminum-free) is the magic ingredient that gives these waffles their puffiness. I don’t recommend using baking soda as a substitute because there isn’t another ingredient here that’s an adequate acid to help it work. Make sure the baking powder isn’t expired as that can affect how fluffy they get.
- Sugar – Cane sugar or another granulated variety such as coconut sugar, turbinado, or brown sugar adds a perfect touch of sweetness. Maple syrup or agave nectar can work as well.
- Salt – Salt helps enhance all the delicious flavors of these waffles.
- Oil Spray – You may not need this one if your waffle iron is nonstick. Be sure to select an oil spray that is free of chemicals to prevent harming the surface of the iron.
How To Make Vegan Protein Waffles
Here are some quick visual steps. Find the full recipe with exact measurements on the recipe card below.
Preheat your waffle iron, melt the coconut oil, and let the plant milk start to come to room temperature.
Add all of the dry ingredients to a large mixing bowl and whisk them together until it’s free of any clumps.
Pour in the plant milk and melted coconut oil. Gently fold them together until they are fully combined.
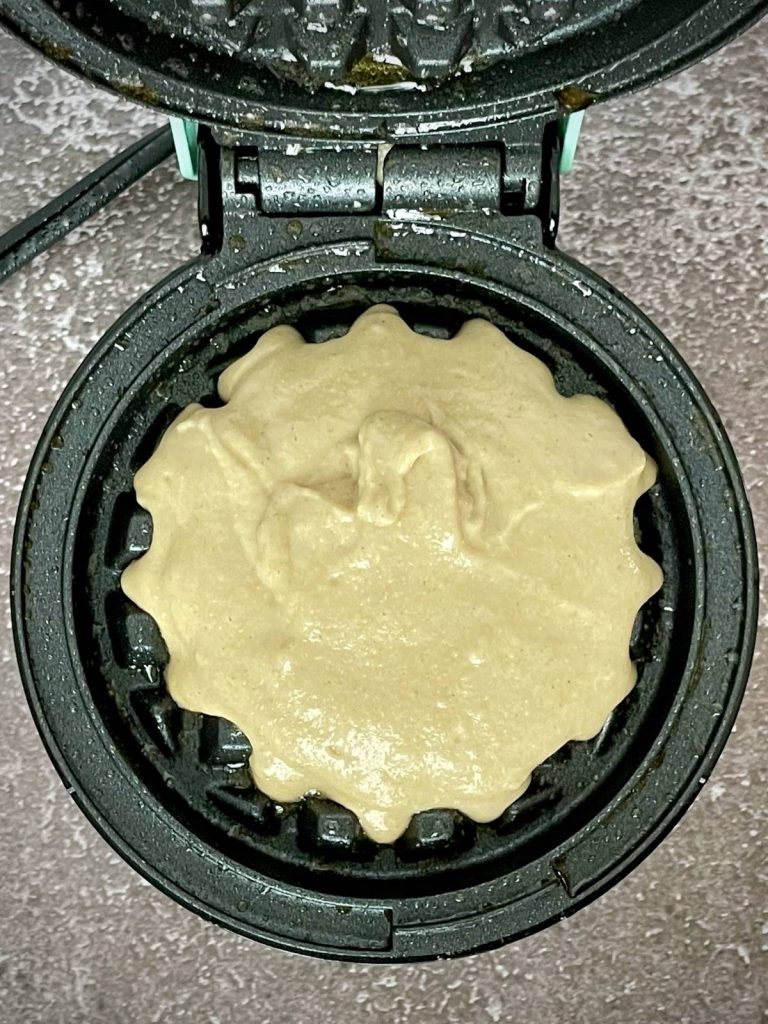
The texture of the batter should be thick and scoopable. It’s okay if there are some lumps in it. Add a bit more plant milk if it’s too thick or add more flour if it’s too runny.
Grease the waffle iron with cooking spray if it is not nonstick.
Add a few spoonfuls of protein waffle mix to the sizzling hot iron until it’s 1 centimeter away from the edge. The amount will vary here based on the size of your waffle maker.
Let each waffle cook for about 4-6 minutes. A good trick to know if the the waffle is still cooking is if you see steam rising from the waffle iron.
Take a peek once the steam stops. You want the waffles to be a golden brown color before removing them. Caution! The waffle maker will be hot. Remove the waffles with either a fork or tongs. Repeat this process until you’ve used up all of the batter.

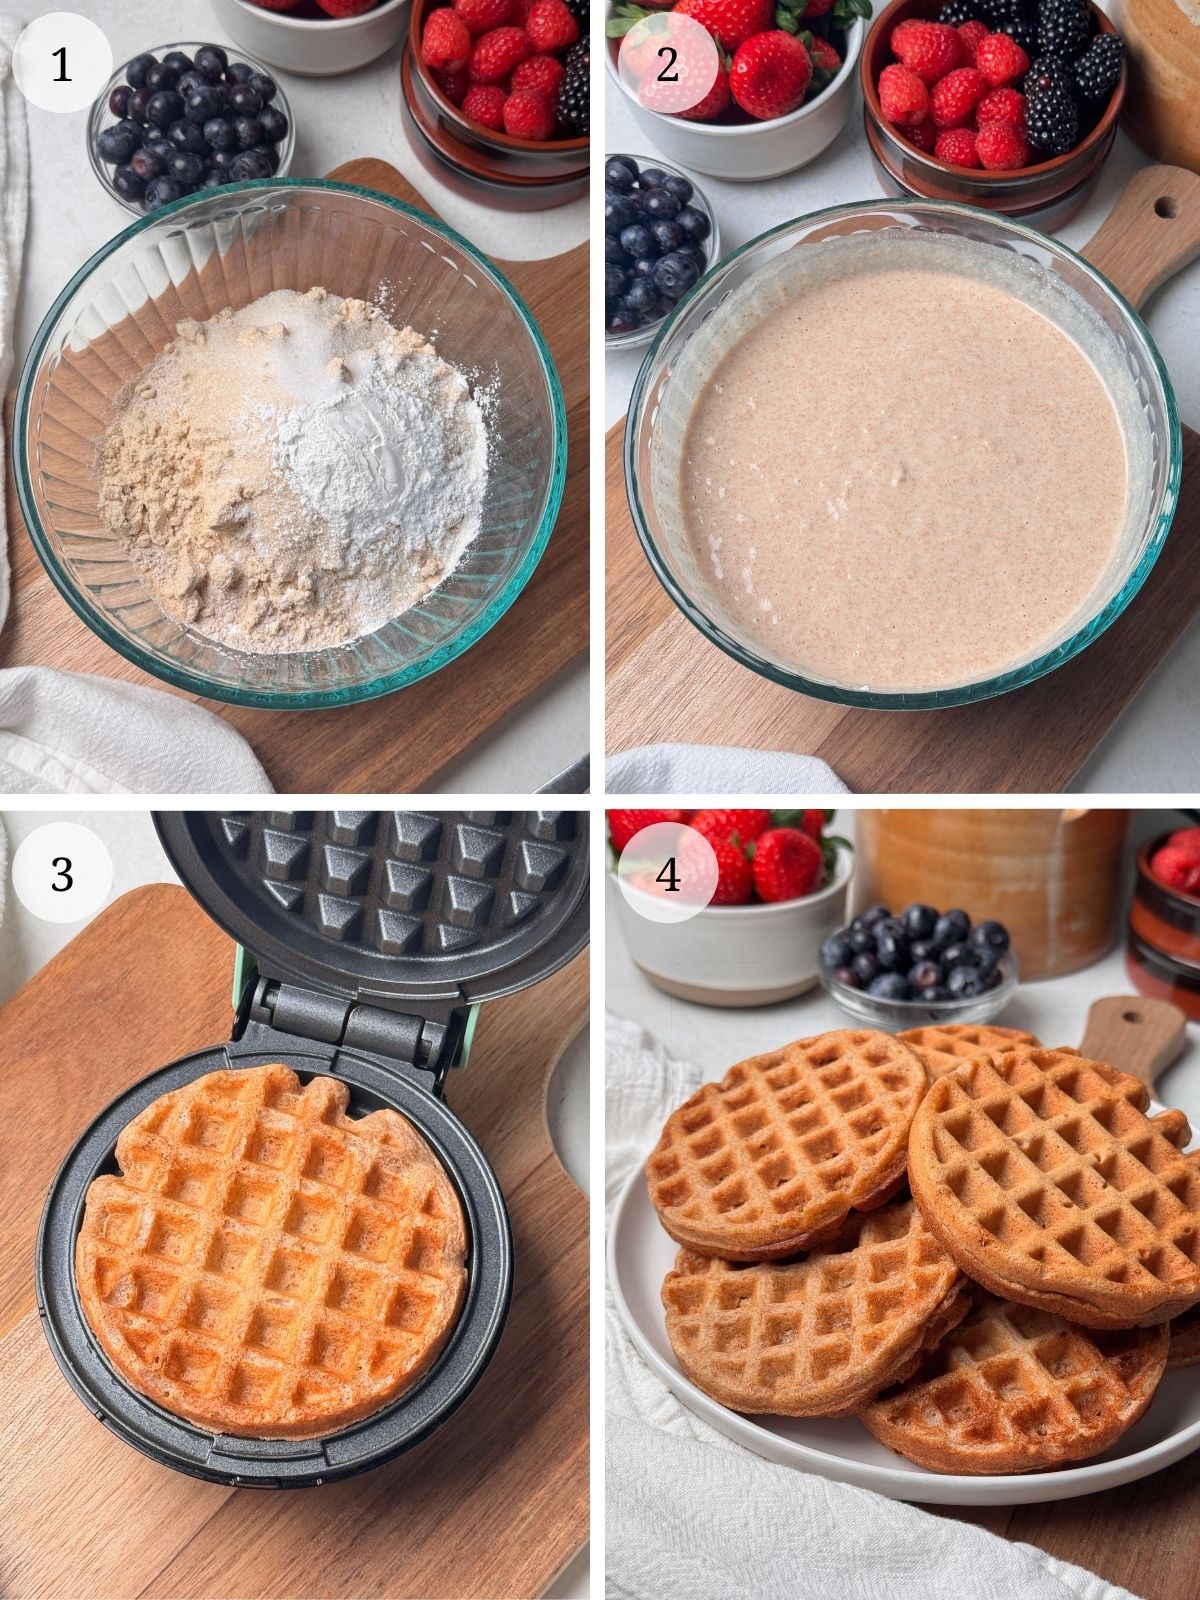
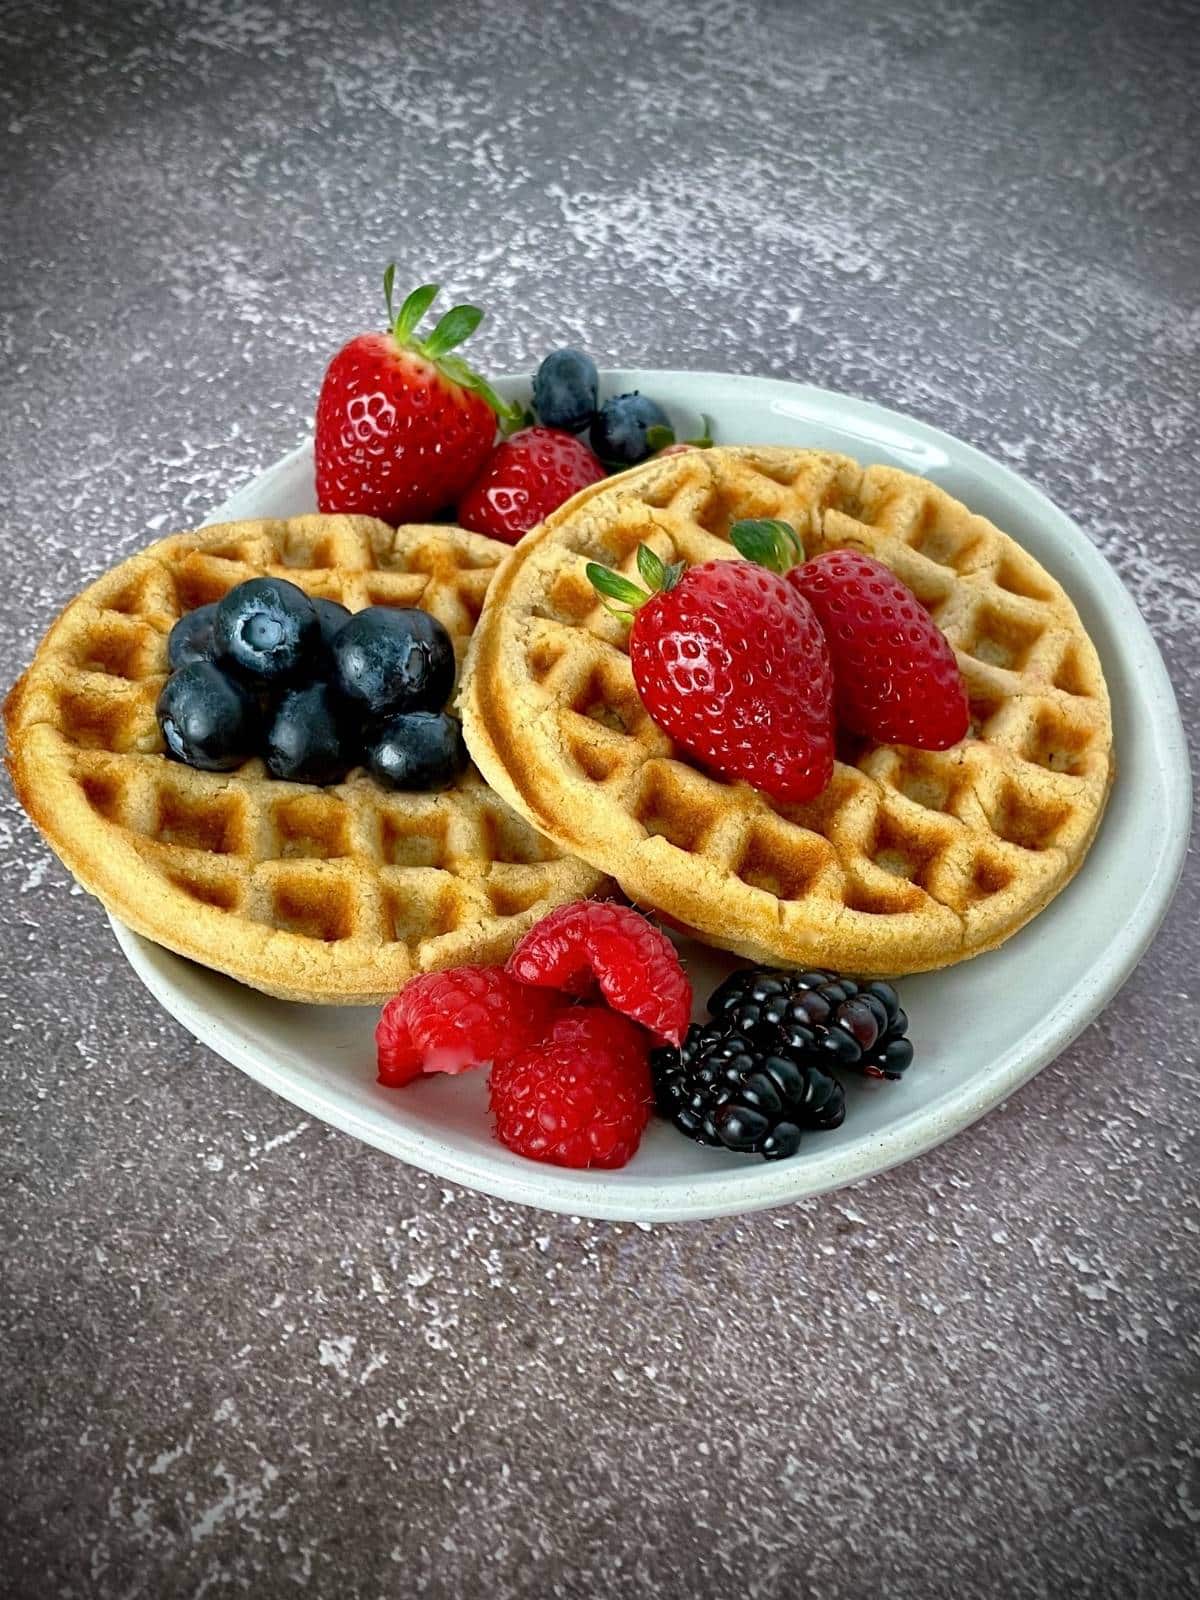
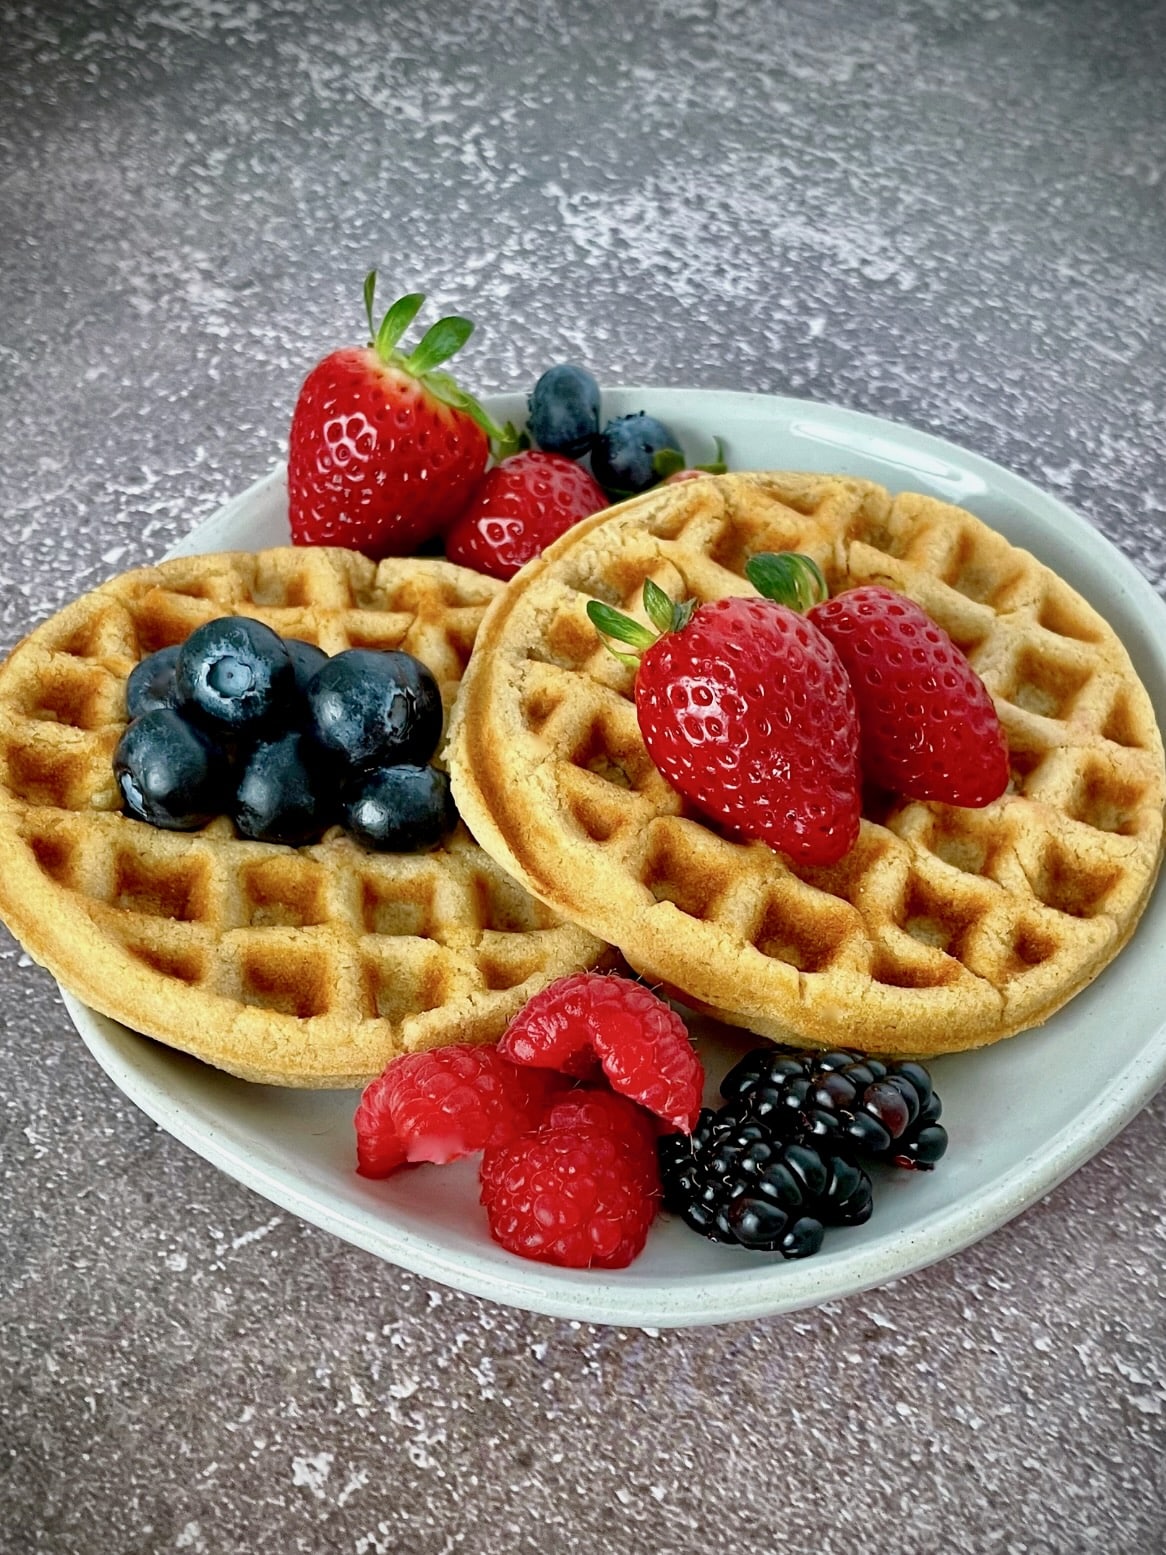
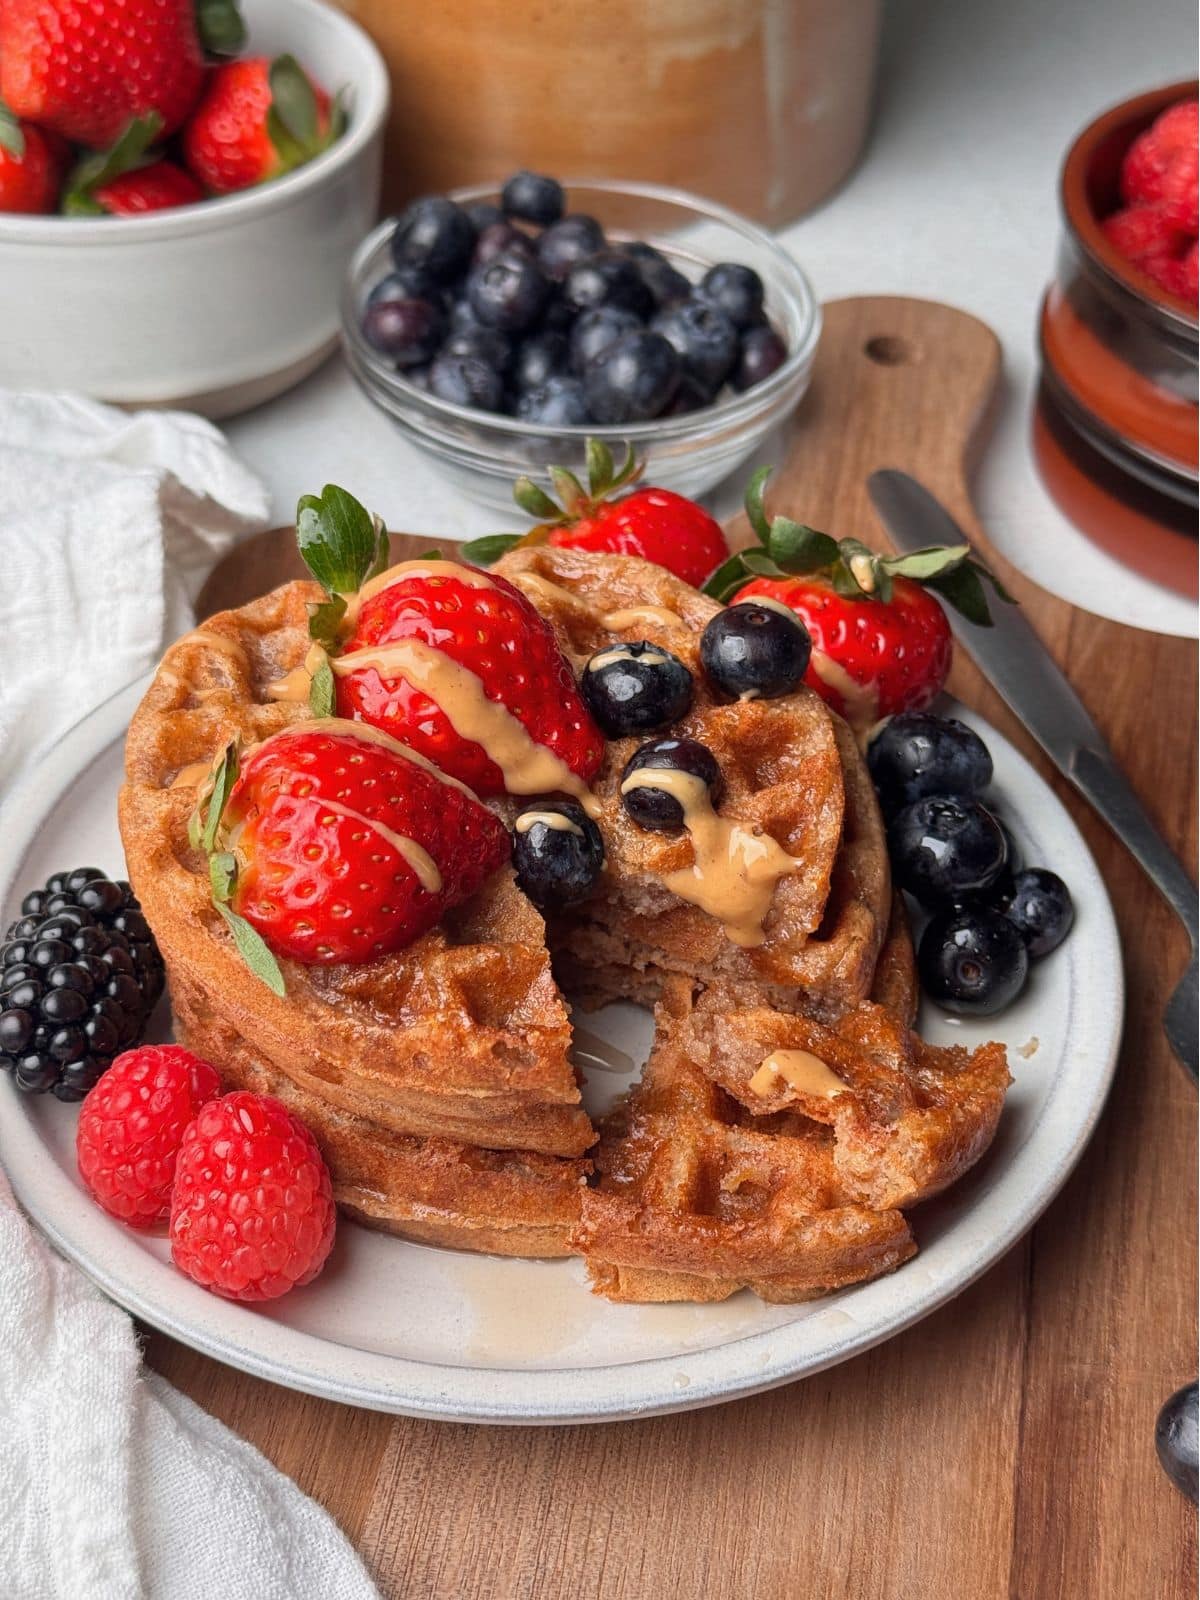
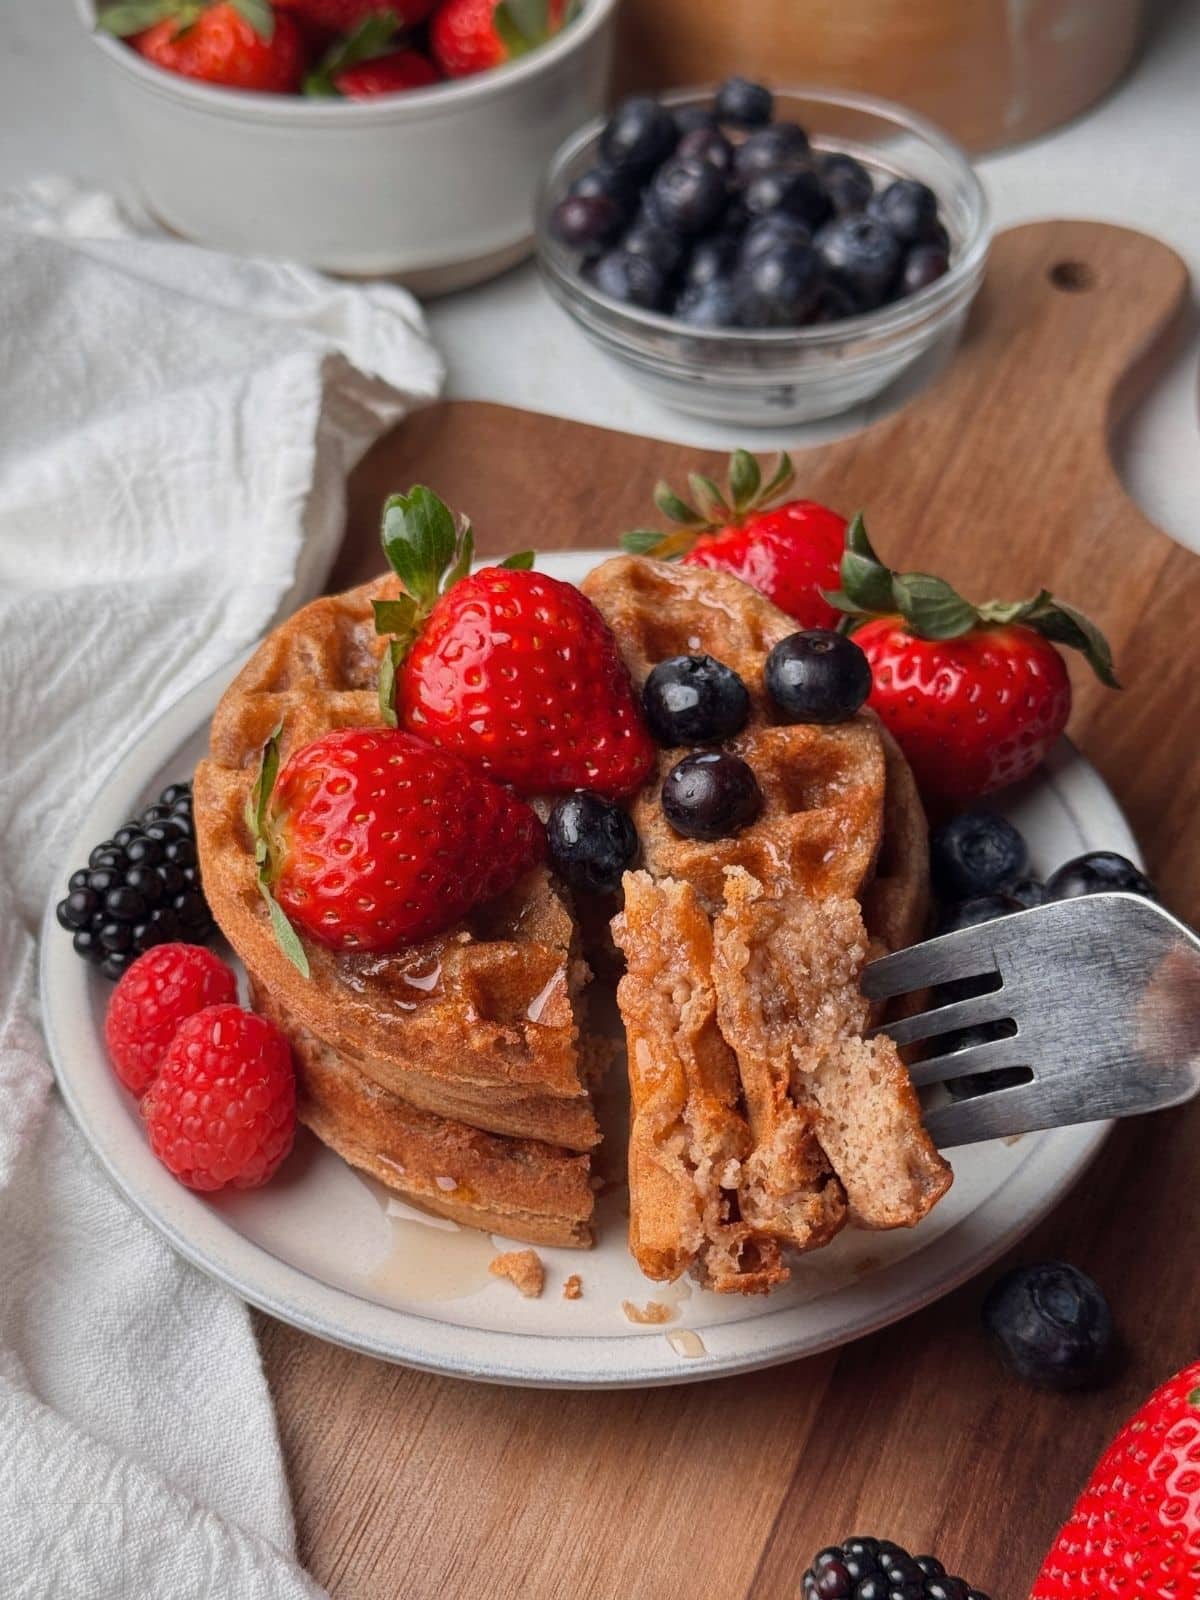
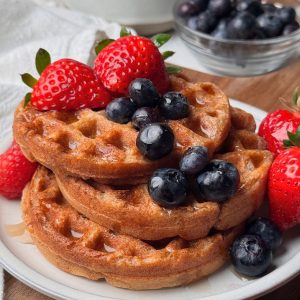
Enjoy the waffles as they are, or add your favorite toppings!
Topping Ideas
- Healthy fresh fruit
- Nut or seed butters
- Maple Syrup or agave nectar
- Plant-based yogurt, such as soy
- Chocolate chips or melted chocolate drizzled over top
- Nutritious seeds such as chia, flax, pumpkin, or hemp hearts
- Make them savory with vegan meats such as bacon or breaded “chicken”
Storage & Reheat
Once the waffles have cooled down, store them in an air-tight container and in the refrigerator for 5 days. Another option is to separate them with parchment paper and freeze them for 3 months.
Simply pop them in the toaster or toaster oven straight from the refrigerator or freezer. You can also warm them up in the microwave for a softer texture.


I hope you loved this recipe! If you try it, please let me know what you think with a rating and comment below. Your feedback really supports my blog and is helpful to other readers! 🙂 You can stay updated on my latest recipes by following me on Pinterest and joining my Email List.
Protein Waffles (Vegan)
Bonnie – Serene Trail
Ingredients
- 1 1/2 cups whole wheat flour (175g), or 2 cups all-purpose flour, (240g)
- 1/2 cup plant-based protein powder, vanilla, (50g)
- 2 tablespoons granulated sugar
- 1 tablespoon baking powder
- 1/2 teaspoon salt
- 1/4 cup melted coconut oil, or vegan butter, (55g)
- 2 cups plant-based milk, such as soy, room temperature, (473ml)
Instructions
- Add the flour, protein powder, sugar, baking powder, and salt to a large mixing bowl. Whisk them together until they're fully combined and free of clumps.
- Gently fold in the coconut oil and plant milk just until you don't see streaks of flour anymore. The batter should be thick and scoopable. It’s okay if there are some lumps in it. Add a little more plant milk if it’s too thick or some flour if it’s too runny.
- Turn the waffle iron on and grease it with cooking spray once heated, unless it's nonstick. Add a few spoonfuls of the batter until it's about 1 centimeter away from the edge. The amount will vary based on the size of your waffle maker.
- Cook each waffle for about 4-6 minutes until they are golden brown. Carefully remove them with a fork or tongs. Repeat this process until you’ve used up all of the batter. Tip! You'll know the waffles are done cooking when you don't see any more steam rising from the waffle iron.
Video
Notes
Nutrition
The nutritional information provided is an estimate from third-party calculations.
Pin It For Later!


Easy, good recipe. Makes it easy to incorporate protein powder!
Thank you so much, Amanda! I’m glad you like these waffles.
This recipe is amazing and SOOO easy to make! My kids absolutely LOVED them as well!!! Thank you so much!
Hi Brian, I’m so happy to hear that everyone liked the waffles!
Easy recipe!
Woohoo! Great to hear!
Is there any other sub for the whole wheat flour? I tried a 1:1 GF flour and subbed the coconut sugar for ripe banana. The waffles tasted great, but came out gummy on the inside. Any suggestions for better flour subs?
I’m glad you liked the taste! I’ve only made them with whole wheat, all-purpose, and 1-to-1 gf. The whole wheat does produce a more dense texture, but not gummy. I wonder if the banana gave them a gummier texture as they do in banana breads?
Great recipe! My kids loved it and can’t tell that it’s good for them 🙂
Yay! What a win!!